
Bulk uploading can be an effective way to maintain large sets of users on an LMS when connecting to external databases and self enrolment are not options. This can often be the case in a corporate environment when an LMS is in its early phase of deployment or when HR systems are in the middle of an upgrade.
Moodle provides powerful and flexible bulk user upload and update facility. If you can learn to exploit all of the functionality it removes a lot of the pain from managing users and enrolments. So are you ready to transform your monthly upload from a brain-trauma into a breeze? Try my top ten tips for CSV success.
1. Get the best out of your spreadsheet software
A spreadsheet application such as Microsoft Excel can be used to maintain the user upload file, just save it as a comma delimited CSV file. Here’s how to ensure a successful upload:
- The format for the user upload file requires the first line to contain field names and the following lines to contain the user values for these fields. All data must be separated by a delimiter of your choice, typically a comma.
- Use the TRIM function in Excel in order to remove any leading and trailing spaces. These can cause errors when uploading especially if they occur in the username column as they are not permitted.
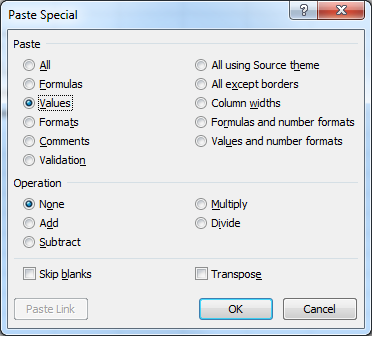
- If formulas have been used to create columns (such as when using Excel’s TRIM function), make sure to use value paste using Excel’s special paste feature to copy over the generated data.
- Check the output file in a text editor after saving the file in Excel. Look out for trailing commas which might be artefacts of deleted columns.
2. Build in safeguards using the upload settings
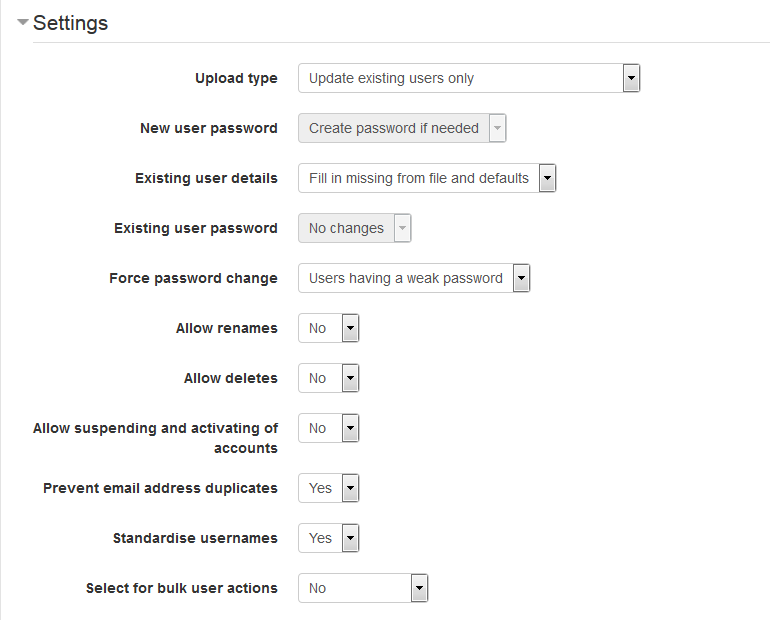
The settings section can be used as an invaluable safety tool when uploading users:
- The “Upload type” setting can restrict whether new users can be created or existing users updated.
- Further restrictions can be put on whether renaming, deleting and suspending is allowed by the user upload operation.
- The “Existing user details” option setting gives you more fine grain control on what to do with existing users.
- To avoid any unnecessary headaches, always use the most reserved settings required to achieve your goal.
3. Make big changes with bulk user actions
You may select new, updated or all users uploaded for a bulk user action such as sending them a message, forcing them to change their passwords or adding them to a cohort.
4. Get your country names correct
The country field must be populated with a capitalised two letter country code following the ISO 3166-1 standard. GB would be used for United Kingdom, for example. These codes can be found on the ISO website.
5. Forget manual enrolments and auto-enrol with cohorts
This can be a great way to automatically enrol users onto courses when combined with the cohort synch enrolment method.
- Users can be added to cohorts by including cohort columns such as cohort1, cohort2, etc in the user upload file. You can add users to as many cohorts as you need.
- Cohort IDs must be used for the values.
- Watch out when removing users from a cohort as this may result in unenrolling them from multiple courses which involves deletion of all user data from the affected courses.
6. Have custom profile fields? Not to worry!
Custom profile fields can be populated by including their “shortname” with the profile_field_ prefix. So for a custom profile field called “role”, the column should be titled profile_field_role.
7. Use it to delete and suspend users
Existing users can be deleted or suspended in bulk by including the deleted / suspended columns in the user upload file.
- A value of 1 in either column will mark that user to be suspended / deleted.
- A value of 0 in the suspended column will unsuspend the user. Please be aware that a delete operation is permanent!
- “Allow deletes”/ “Allow suspending and activating of accounts” setting must be set to “Yes” and the “Upload type” setting must allow the updating of existing users for this to work.
8. Yes, you can bulk update usernames too!
Often it’s a good idea to align usernames with email addresses or Active Directory IDs, but these can change with IT system updates. Don’t worry – usernames can be updated by including an oldusername column in the user upload file.
- The oldusername column should be set to the existing user’s username and the username column must contain the new desired username.
- The “Allow renames” setting must be set to “Yes” for this to work.
9. Explore more detailed results to solve upload problems
After the upload operation completes, you are presented with a results page showing the status of each individual user upload along with a summary at the bottom of the page:
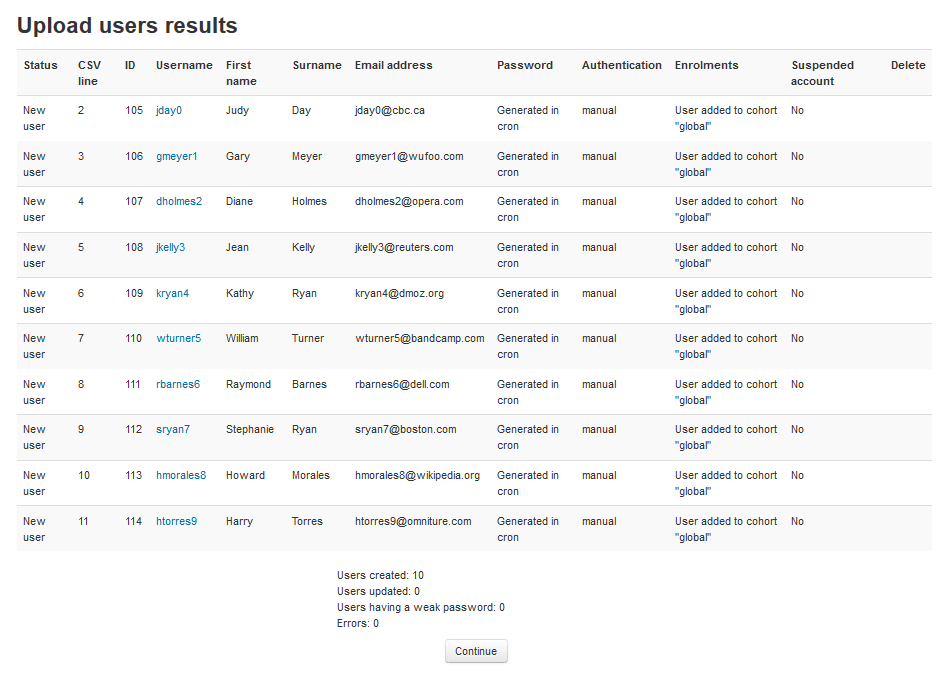
- The summary allows us to quickly check if there were any errors with our upload and these can explored in more detail by tracking them down through the status column.
- If you are experiencing cryptic errors, enabling debugging should provide you with a more verbose error output.
- Be sure to also check that the users created and updated values match what you are expecting. It can be easy to miss something like a misspelled user name resulting in a new user to be created instead of the existing one getting updated.
10. Try it in a test environment first
Getting it wrong can result in undesired data being created in the system and/or existing data being overwritten or lost.
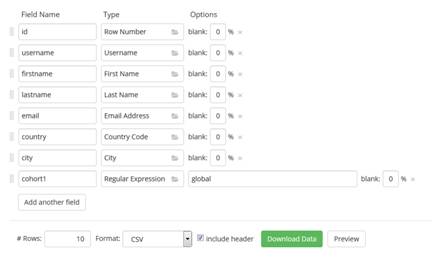
- Mockaroo is a great tool for generating sample data with all of the columns you require. This can then be output as a CSV file to use for testing.
- Make sure to always perform user uploads in a test environment first.
I hope you found my ten tips useful. Learning about the more detailed functionality of Moodle and the supporting tools we use to manage it is a great investment of time for LMS administrators who want to improve their productivity and performance, so I’ll be posting more indispensable tips soon. And if you have a trickier LMS issue, then why not contact Saffron to speak with one of our consultants?